

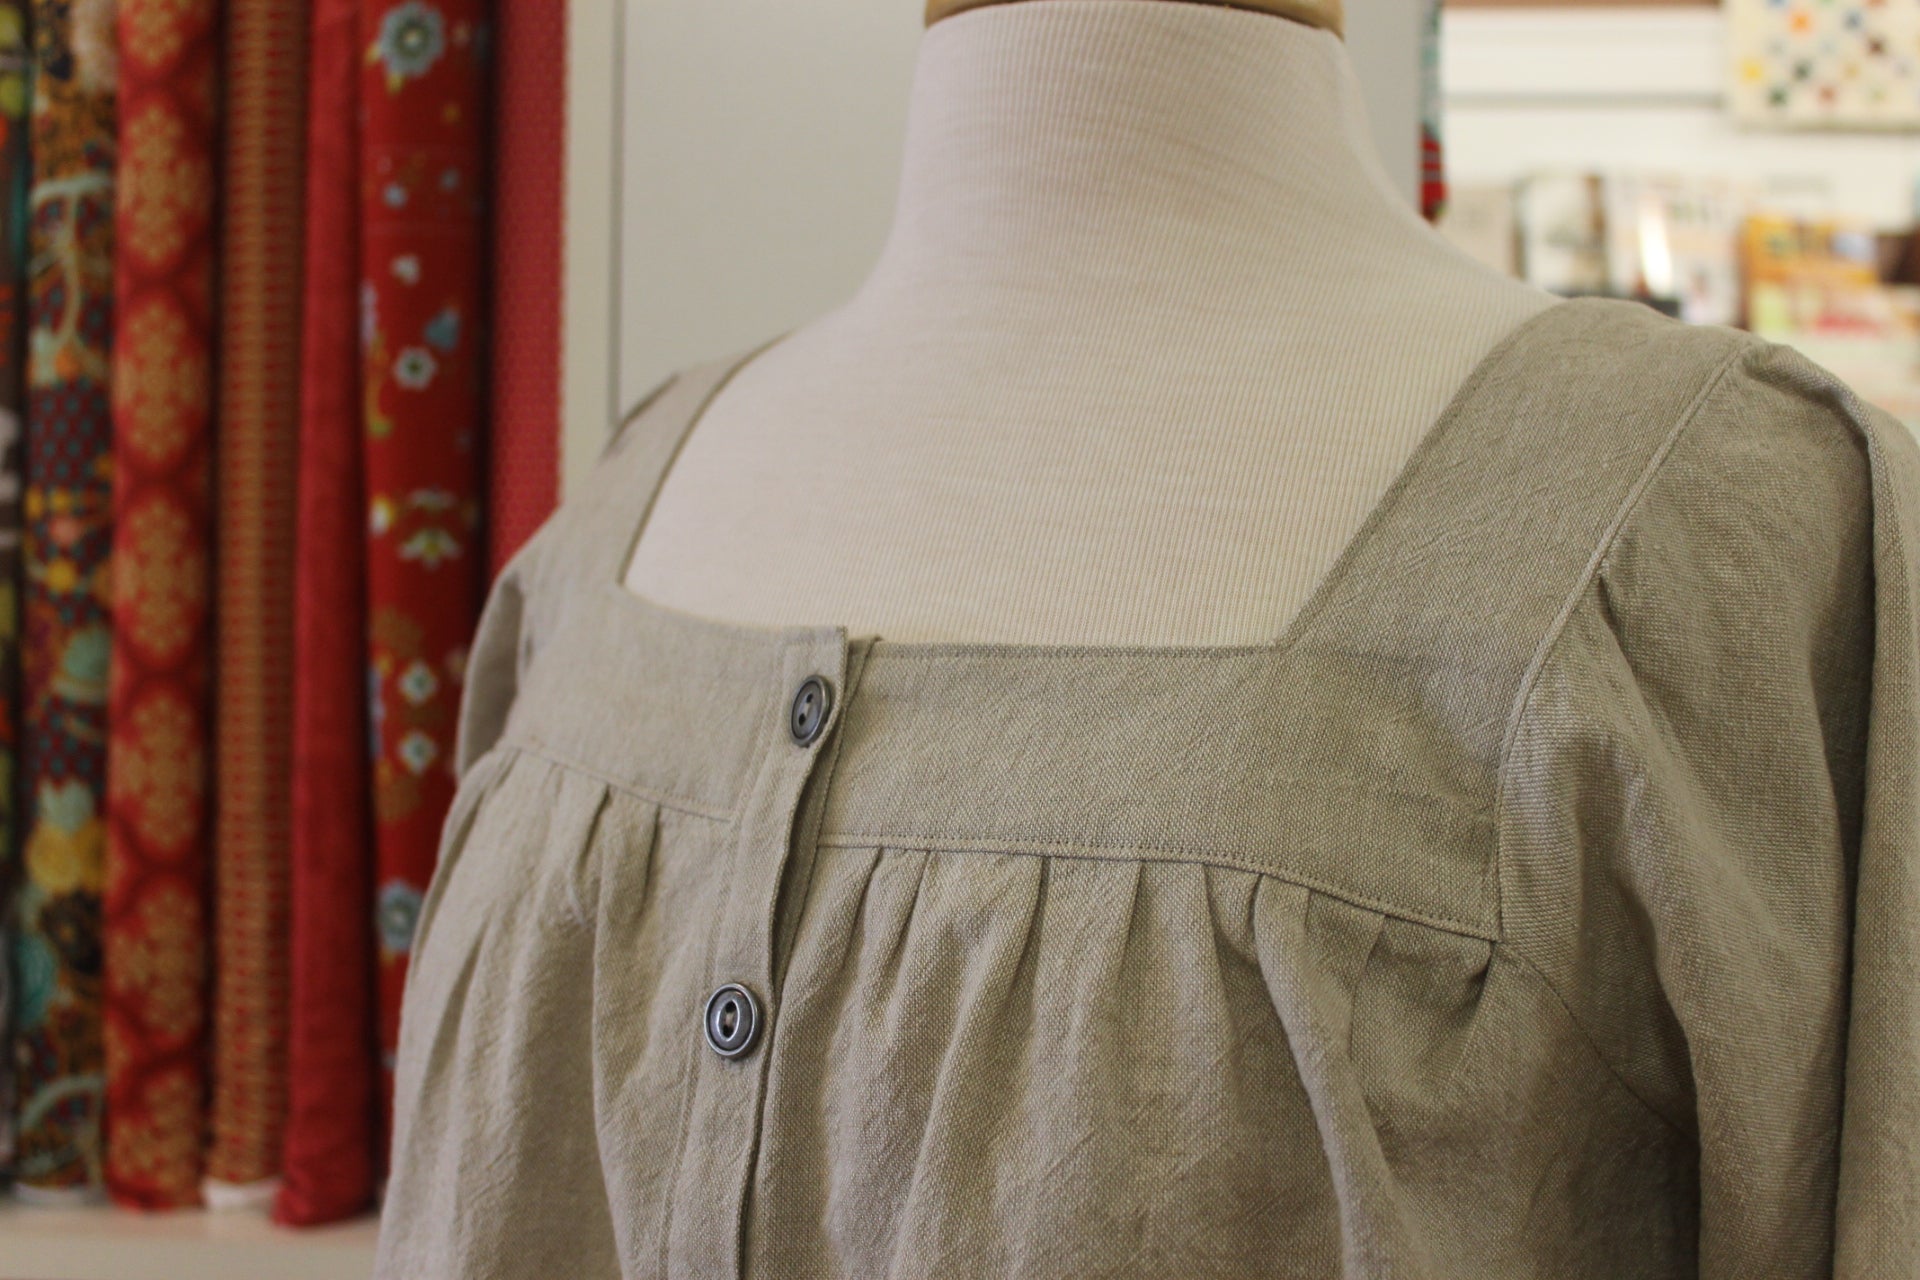


Driftwood Apron - Looking at Different Layout Options

This post will focus on the layout for the pattern pieces. We will give you a few pointers for both 56" wide (or greater) fabrics and for 45" or 54" wide fabrics. And, we will go over how to think about the layout for directional fabrics.

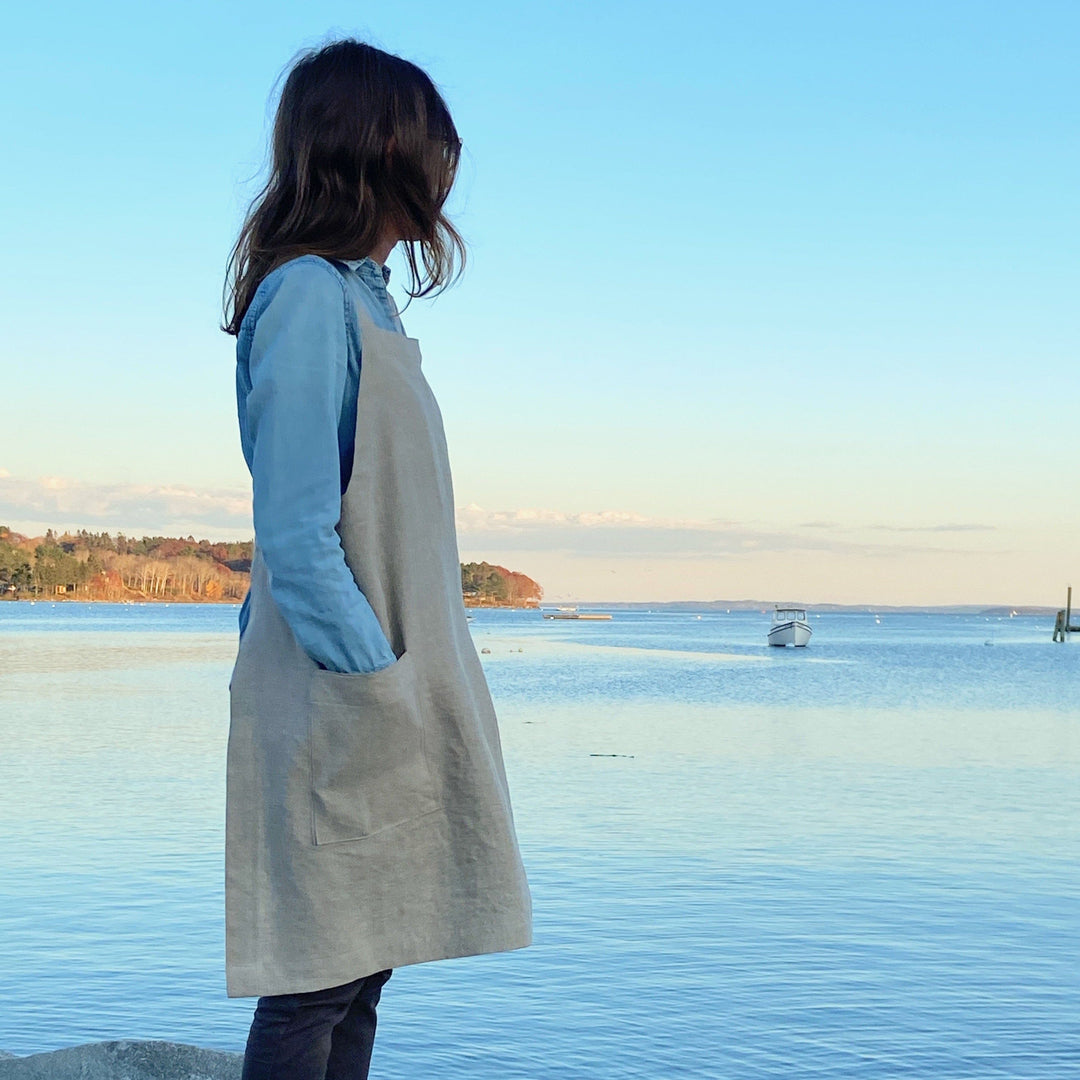
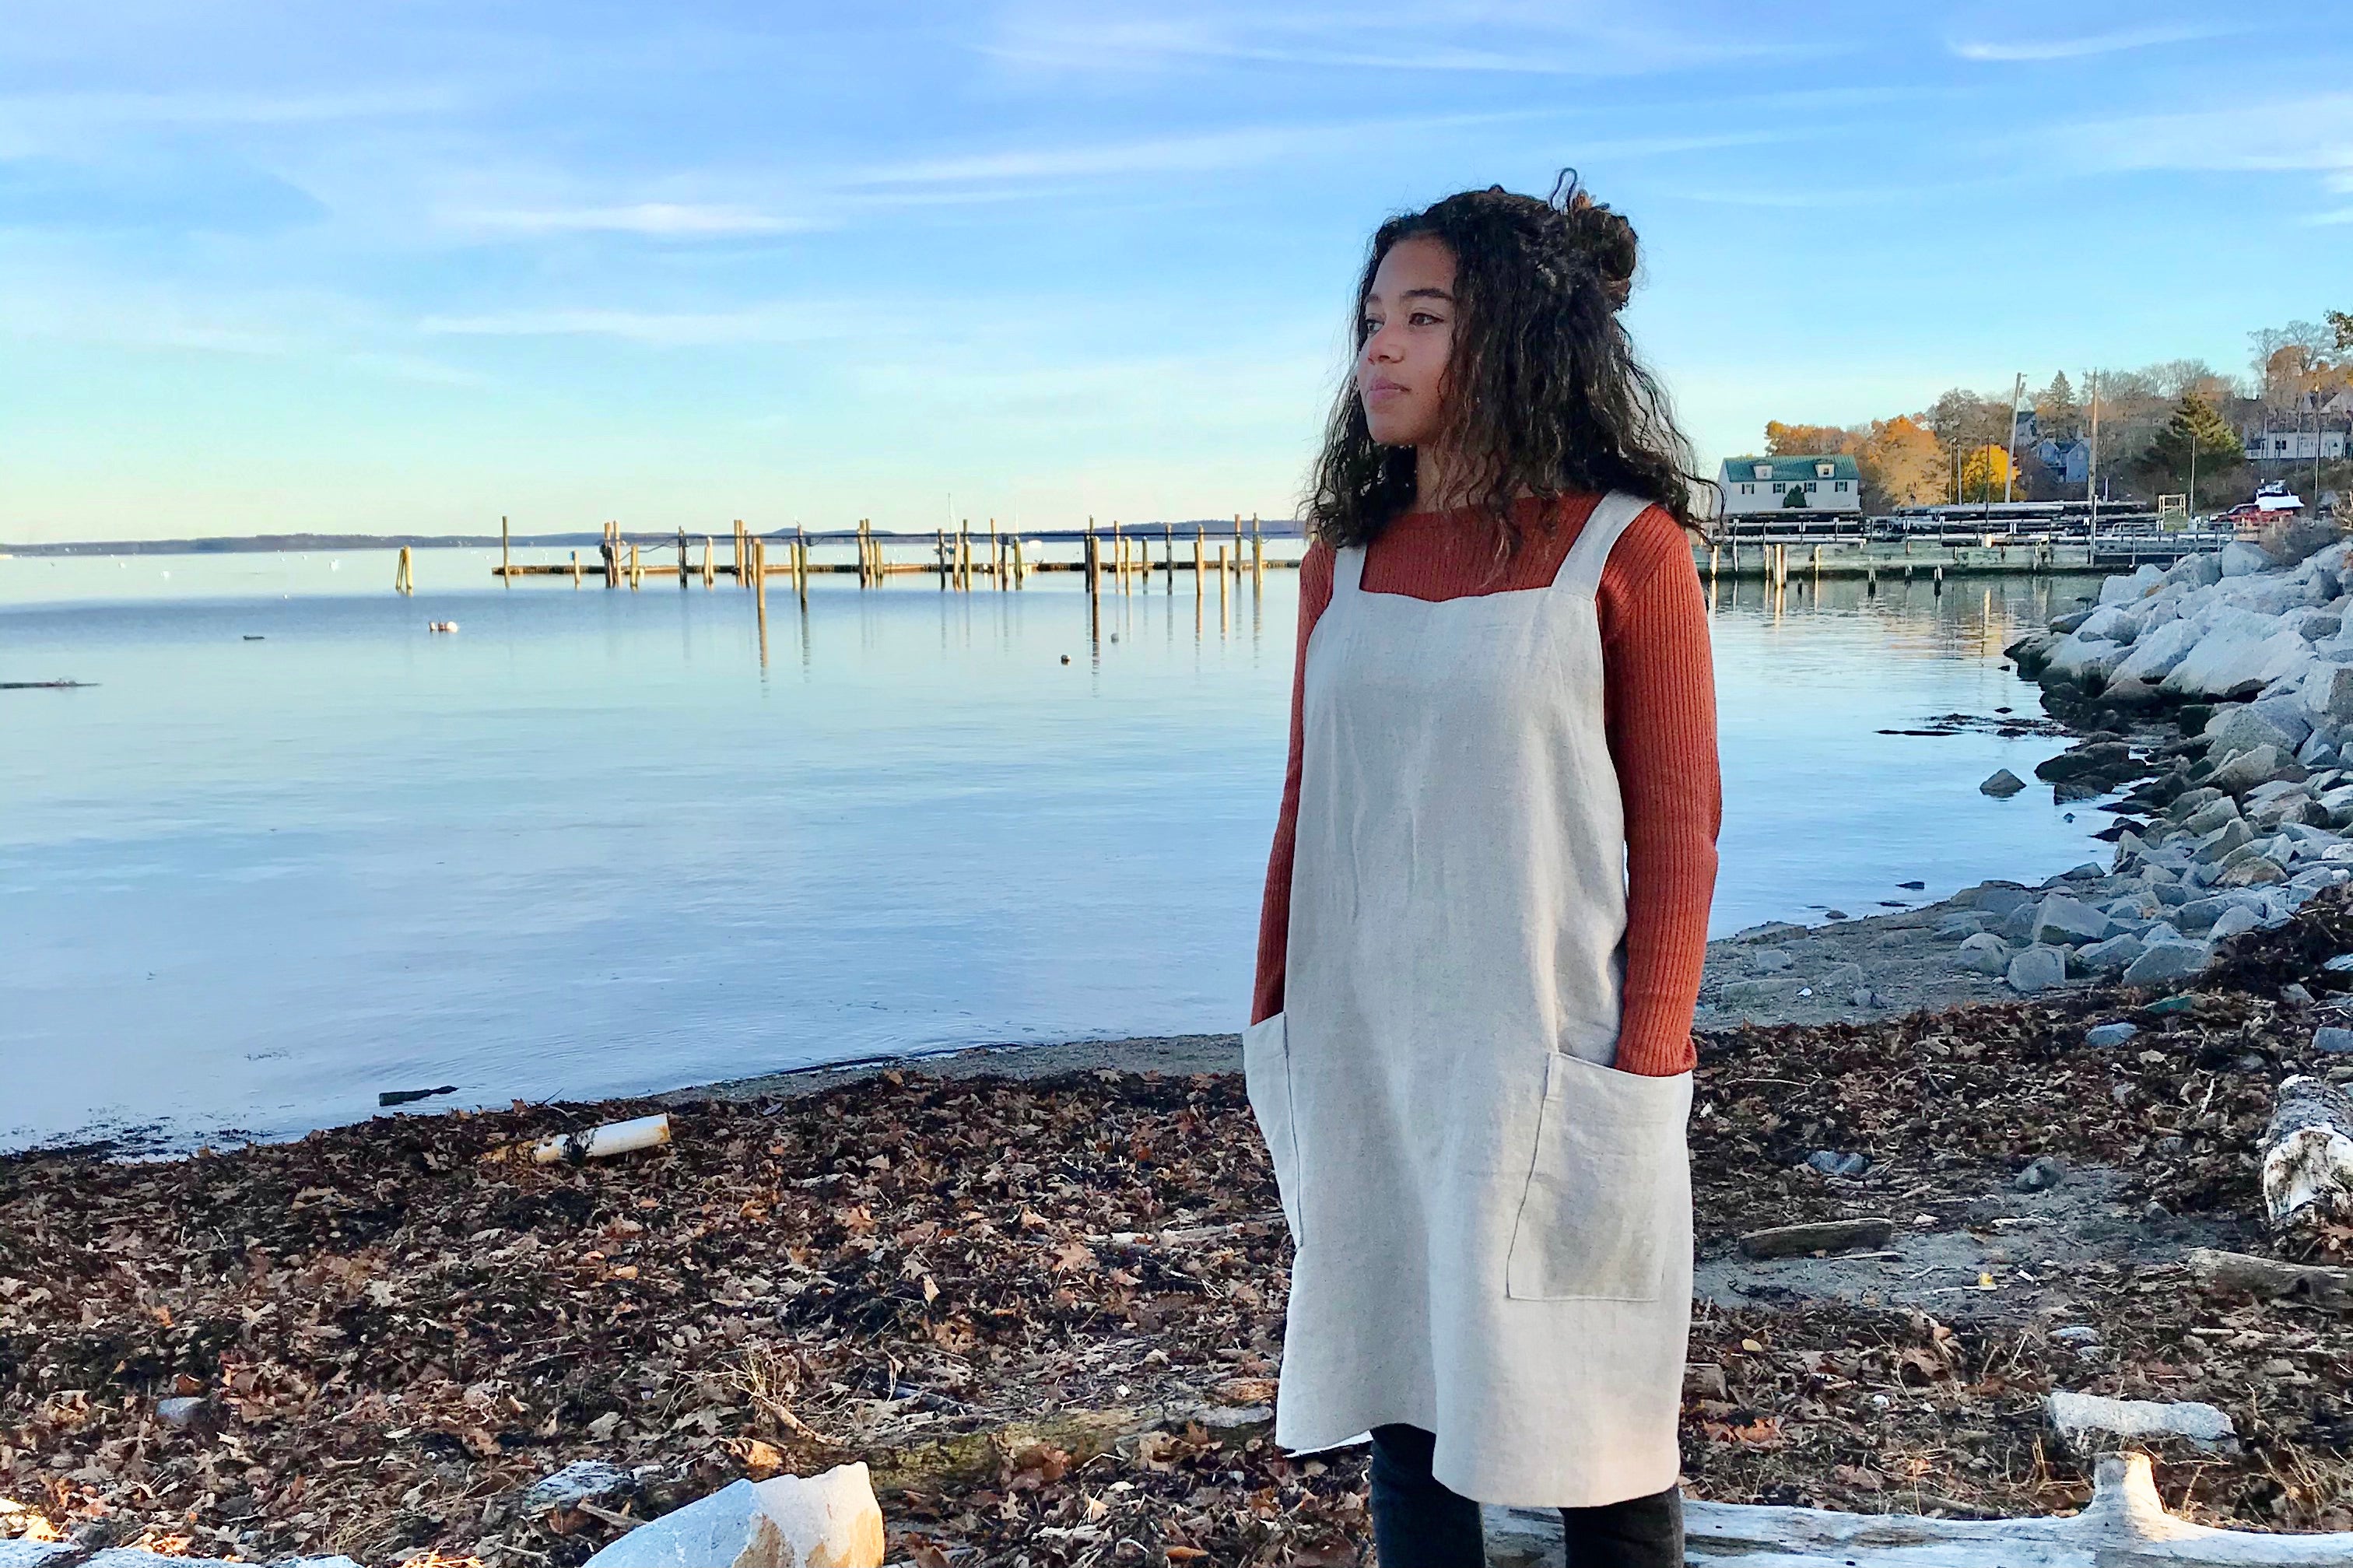
We are using two fabrics in this sew along. 1 1/2 yards of Driftwood Linen in Saffron and 2 yards of a directional 45" wide linen cotton canvas print from Cotton + Steel. It is Fable in gray from Rifle Paper Co.'s Wildwood collection.
Definitely prewash your fabrics! Most natural fiber fabrics will shrink up at least a bit when they are washed, and with any garment, you want all that shrinking to happen BEFORE you make your garment! (For an apron that isn't very fitted, this isn't a super big deal, but it's always good practice!)
And then press your fabric. It is hard to get a nice even layout and cut if you are fighting wrinkles, and with linen you definitely will be!

Cut out all four of the pattern pieces. Most of the pieces are just one size, so there isn't any need to trace them out on a pattern paper... unless you want to! The strap piece does have two size options - just cut out the biggest one.

Line up the selvedges from opposite sides - shake the fabric out and adjust as needed until the selvedges match evenly for their entire length. This will give you a center fold, which is also on the grainline.
Lay the folded fabric out on a flat surface.

Driftwood Linen is 58" to 60" wide. When folded in half it will measure 29" to 30" wide. This allows for both the width of the main body piece (20.5" on the fold) and the width of the straps (6"). Unfortunately, many wide fabrics are 54" wide and after you allow for shrinkage and trimming off the selvedges, the straps will most likely not be able to be laid out next to the main body piece.
That is why you only need 1 1/2 yards of the Driftwood Linen or other fabrics wider than 56" to make this pattern. For all other fabrics you will need 2 yards.

Lay out the main body piece on the fold, the facing right above it on the fold, and the pocket piece nested in on top of the low part of the facing.

The fabric to the side of the main body will be be enough fabric to cut the two straps on the fold, but it will have to be folded vertically.
The image above shows the pattern piece flipped up to show what will happen when the side piece of fabric is folded in half.

Cut the three pieces out, and the fold the remaining fabric from the side up vertically so that four selvedge edges are now lined up together.

Line up the correct fold line for your size on the fold and cut out the straps. The image above shows the layout of the pattern piece for the two different sizes.
Laying Out the Pieces with a 45" Wide Directional Print

And now, onto the lay out for a 45" wide fabric (it will also be the same for 54" wide fabrics) and also how to think about directional prints.
A "directional print" is one where there is definitely a right direction for how the fabric should be laid out. You can see with this fabric how in the bottom of the image the animals are all placed in the same direction. The fabric is folded over in the top of the image, and if you cut it out in that direction, the animals would certainly be upside down.
A "nondirectional print" is one where shapes like trees or animals are facing in lots of different directions, meaning that there is no clear direction to the print, therefore making it nondirectional.

Follow the basic layout provided in the directions. The top image of the two right above shows the first strap placement to cut out on the fold, and then the image below that shows how the strap will need to be placed on the fold again right above the first strap piece (once it is cut out).
But, this is a directional fabric, and notice how the animals will be laid out sideways on the strap (because the straps will be oriented vertically) instead of facing right side up. - We need to turn the strap around 90 degrees.

Put the pocket piece to the side for now, and cut out just the main body and the facing. Once the remaining fabric is separated from those two pieces, fold it in half so that the selvedges line up.

In the image above, you can't see the other half of the fabric that is hidden underneath the part that was folded down, but it will curve up because of the shape the facing took out of it, so the strap piece will need to be laid out close to the selvedges as you will get the longest length on that side.
Also, as you can see in the image, the strap piece doesn't quite fit on the length of the folded fabric if you are cutting out the larger size. This is fine. the pattern was designed so that you will make the strap longer than you need so that there will be enough to find your fit and trim some off. This little bit on the end will most likely not be missed even if you have a bust size of 50". If you are really worried about getting every last bit on the pattern piece, you will need more fabric, or will need to turn the piece around and cut it with the first layout we showed for non directional prints.

Now cut the two pocket pieces out of the remaining fabric. Smaller prints won't need much attention to the placement, but with bold prints like this one, it might be good to pay a bit of attention.
The top of the pocket will be folded down a few times, so the focal bunnies are centered more than half way down. There will still be animals cut in half along the edges, but in these two pockets, there is en entire rabbit towards the middle of each pocket that will catch most of your attention.
Thanks for following along! Share your progress with us! @fiddleheadartisansupply and #FASdriftwoodapron