

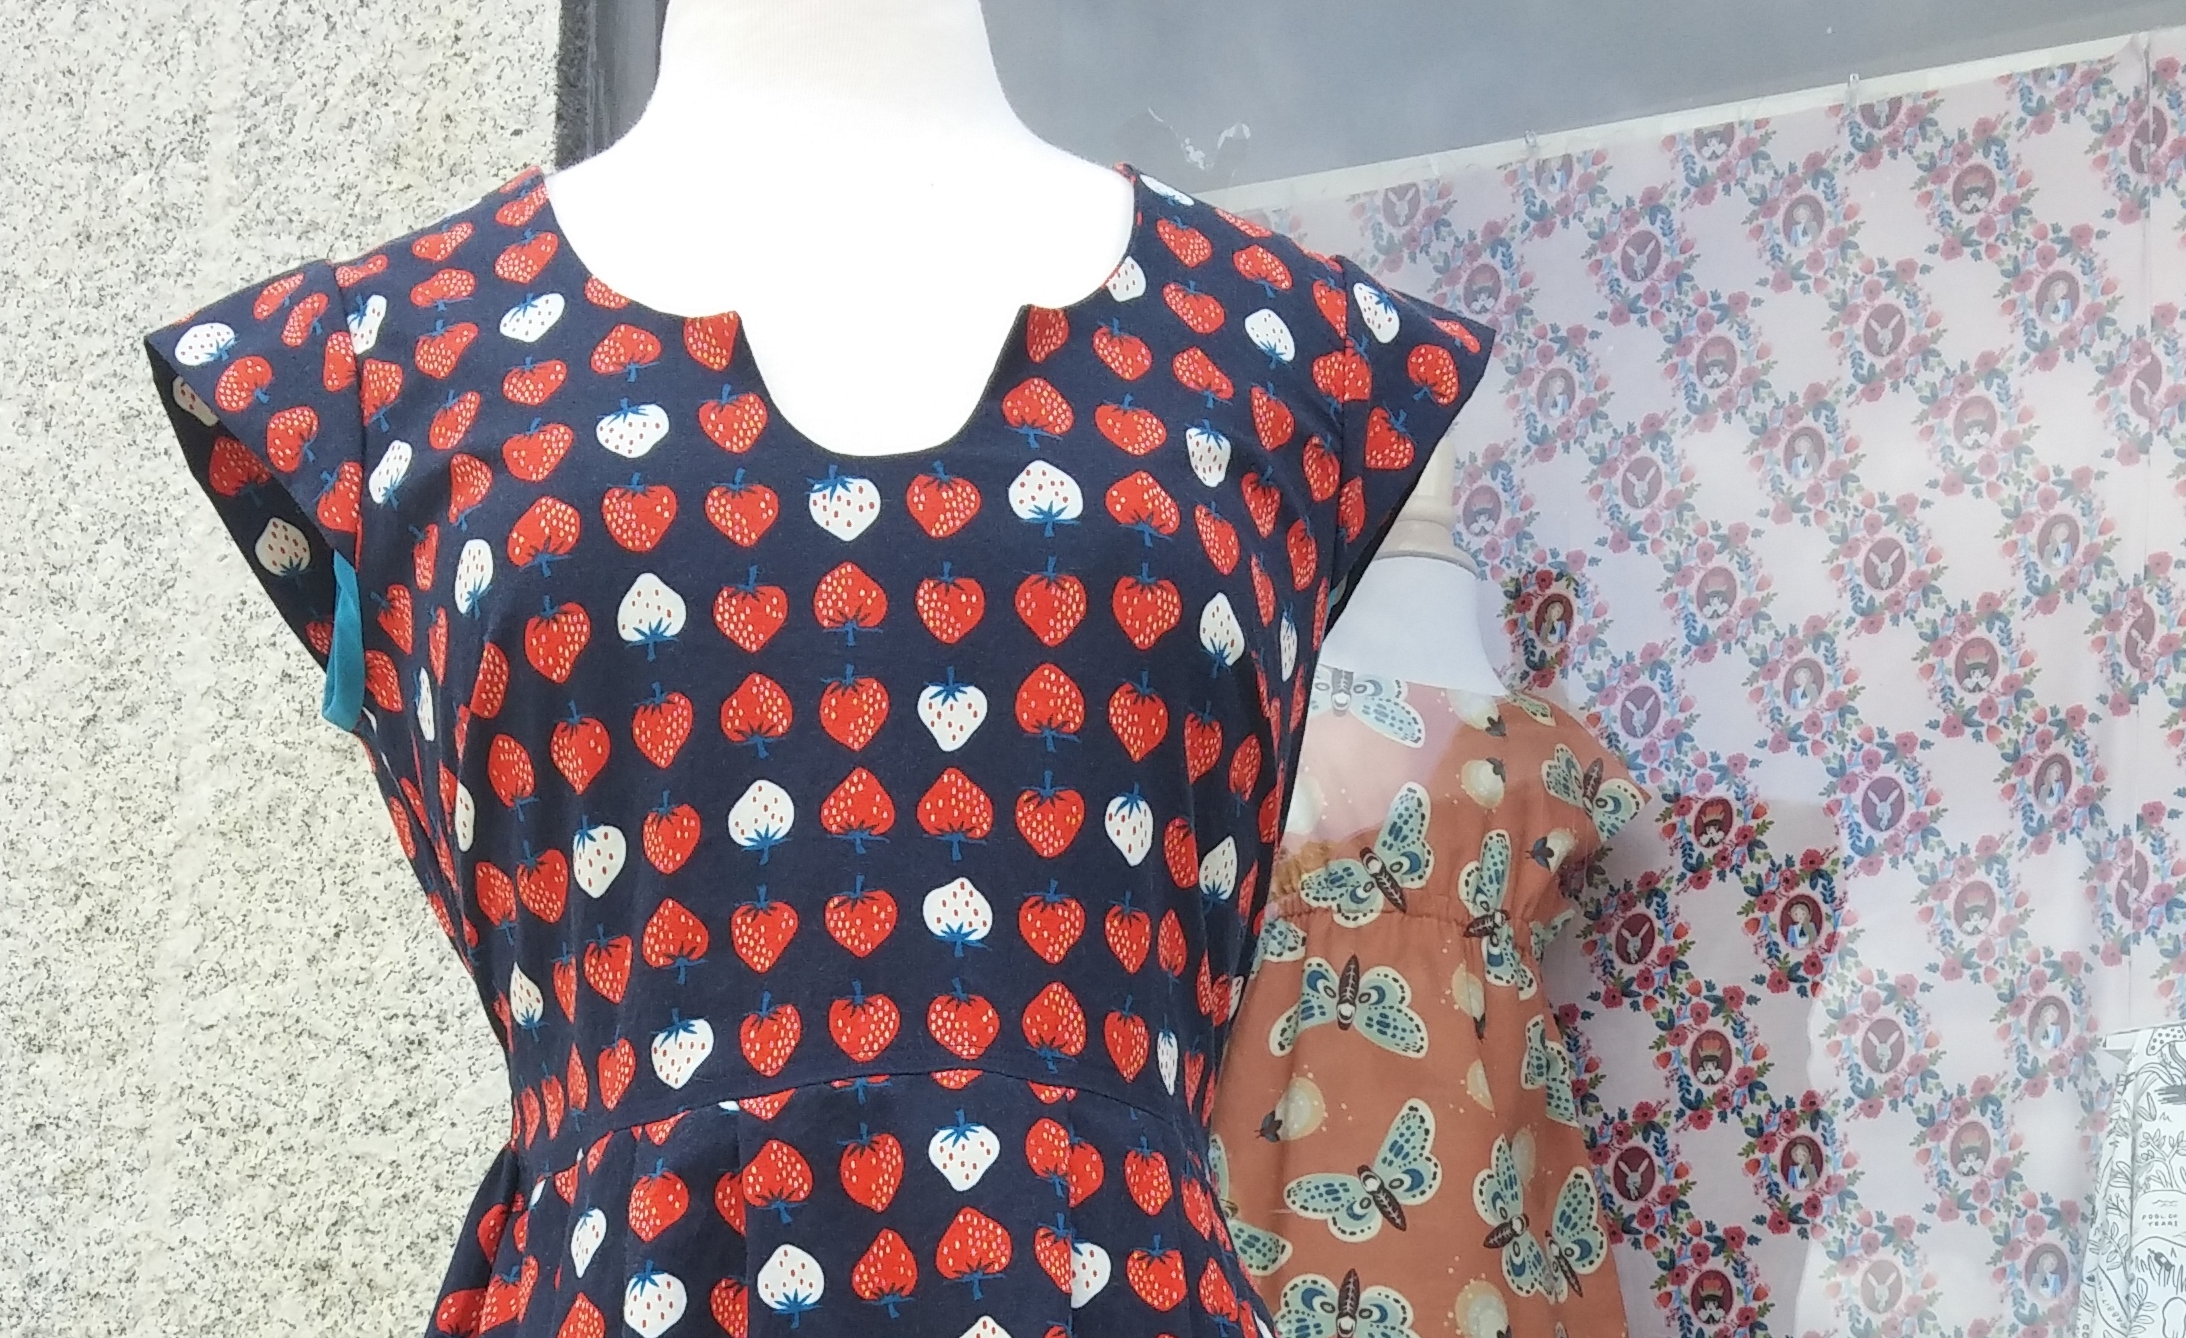


Henriette from Citronille

Katy and Abby both made a Henriette dress. It is a sweet long sleeve dress with a gathered back yoke that can be worn over leggings and a shirt if you are in the colder northern states like we are, and it will be a great stand alone dress too for warmer climates. Another fun thing about this pattern is that, like many of the patterns from Citronille, it is designed for both children and adults. This pattern runs from a child’s size two all the way to an adult European size 46 (39″ chest, 33″ waist, 42″ hips).


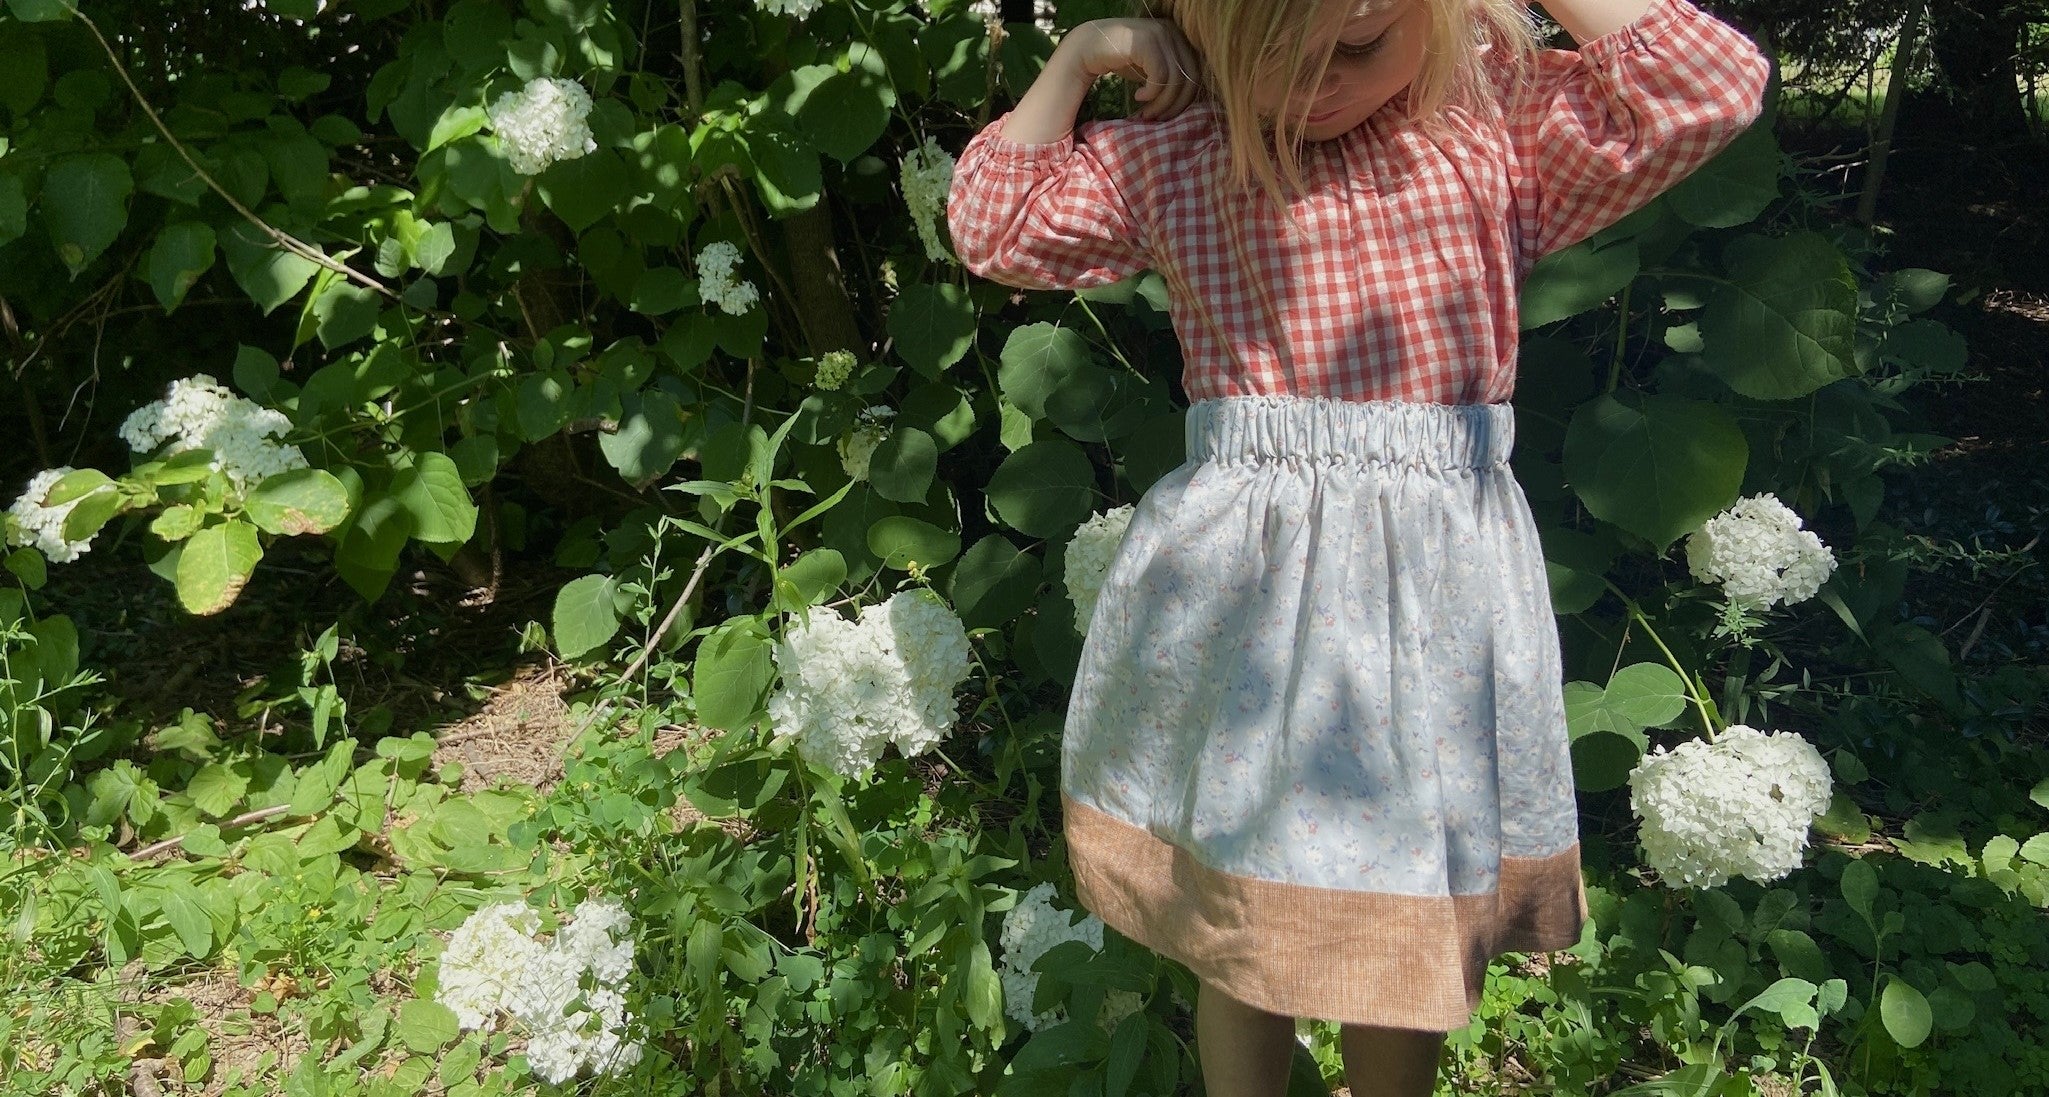
Katy made her Henriette dress for her daughter, who is four. She made it in a size 6 so that there would be room to grow. But, as we have found with Citronille’s patterns, they are not designed for tall people, and the size 6 length will work well for her daughter already. Katy and Abby are both pretty tall and always need to add a little bit onto the length of the patterns they make themselves and their children. Katy used a 21 wale corduroy in amethyst.

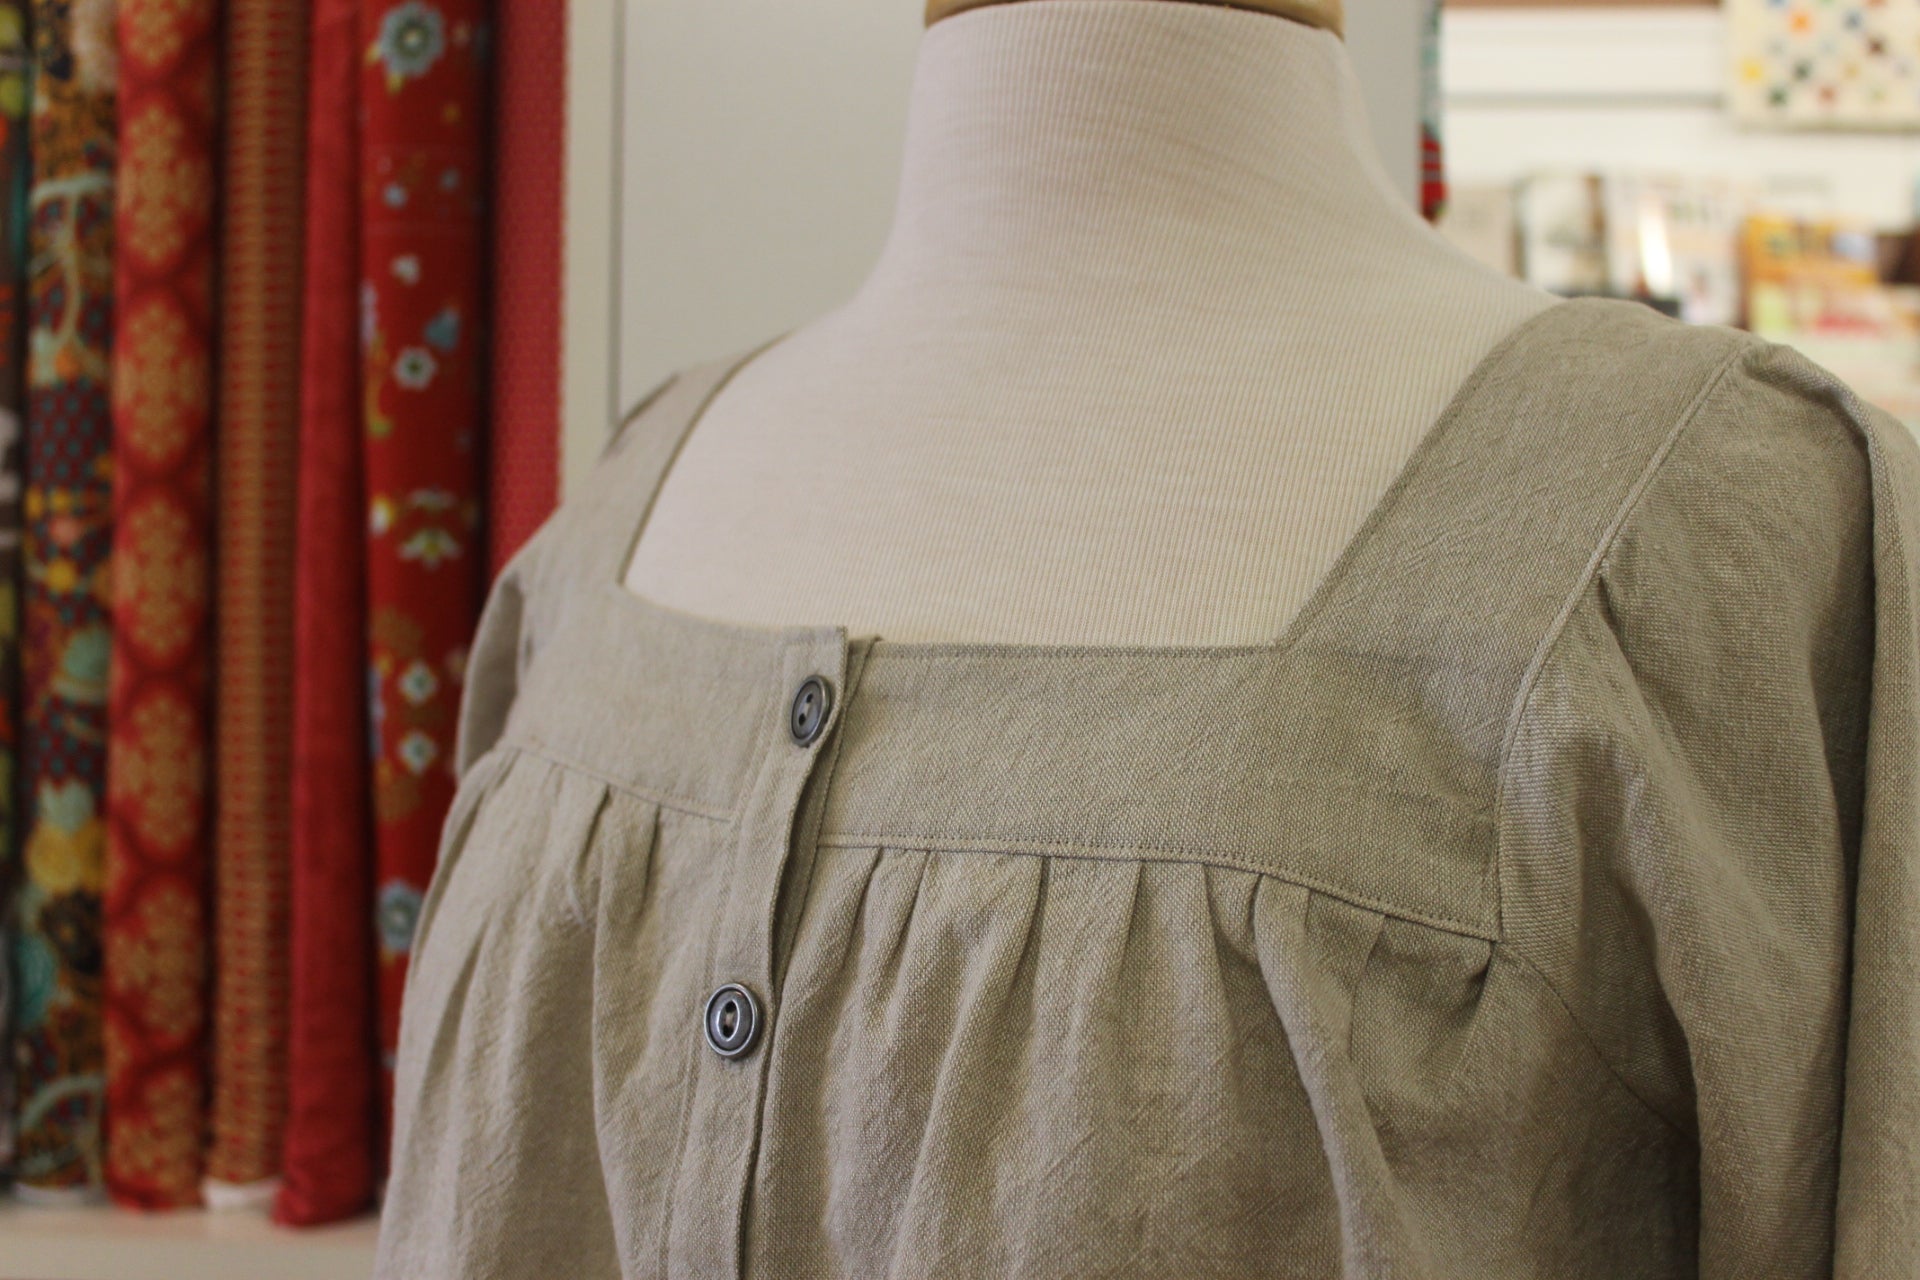
Abby made her version in a size 38 (US 6/8) and lengthened the body and sleeves a bit, she also left off the front pocket. Abby used a bluish green chambray for her dress. Abby writes:
There are no darts in the adult pattern, and I was quite a bit worried about how it would hang on me. But, when I put it on, I was really pleased by how it fit. The top was fitted much more than I was expecting it to be, and was even a bit too tight as you can see in the pull through my chest. the lower part hung well too. I had thought that I would want to add on a belt, and that worked too, but I think I would rather just wear it loose.

Katy’s piece of advice for this pattern (as well as many other of their patterns is that there aren’t notches on the sleeves saying which is the front and which is the back. The pattern pieces themselves have the correct sides labeled on them (Devant for front and Dos for back) but when you cut the pieces out, you will need to come up with your own system to label which side is which.
Abby and Katy were both a bit confused by the directions for the placket and found it helpful to read the directions and look at the diagrams. As you can see in the pictures, their plackets came out to very different widths, but they both work with the dresses! The directions ask you to baste 1cm from the edge when first applying the placket to the opening. You will need to stitch this with a 1cm (3/8″) seam allowance as well.

Katy used snaps for her placket. This works well in a dress for a child where it would be worn closed all the way up. She used SnapSetter snaps. We love this snap system – they are are hammered in with an easy-to-use applicator that works well. The snaps are set into the fabric really firmly, and don’t fall out or become loose as has been our experience with sewn-in snaps. Abby wanted to be able to have the placket open a bit, so she chose to put in buttons.
We hope you will enjoy making your own Henriette, and will send us photos that we can share! .
When sharing photos from this pattern, please email photos to info@fiddleheadartisansupply.com and use the hashtags #citronillehenriette and, tag us too! #fiddleheadartisansupply